Before you start
Use Tyler property lookup when your VAT Stamp application shows the Property Information section. You must be able to edit the application. Have the property's real RPT No. ready.
Tyler can fill some property fields. It does not add the property or save the application for you. Check the preview against your own property information before you apply it. The images below use fictional sample details.
If you need to create the application first, see Start a new VAT Stamp application.
Look up and add the property
- Open an application you can edit.
- Expand Property Information if it is closed.
- Select Add Property.
- Enter the property's RPT No..
- Select Confirm.
-
Review the Tyler property preview. Check Owner, Block, Lot, Jurisdiction, Legal description, and Assessed value (Tyler). Make sure the preview is for the property you intend to add.
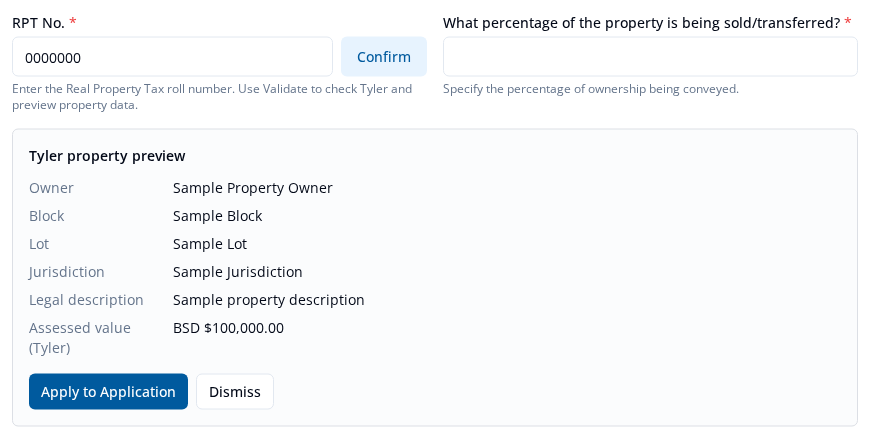
- Select Apply to Application if the preview matches. If it does not, select Dismiss. Correct the RPT No., then select Confirm again.
-
Check the applied Legal Description (as on Conveyance), Island, Lot, Block, and Assessed Value. Tyler's jurisdiction sets the visible Island value.
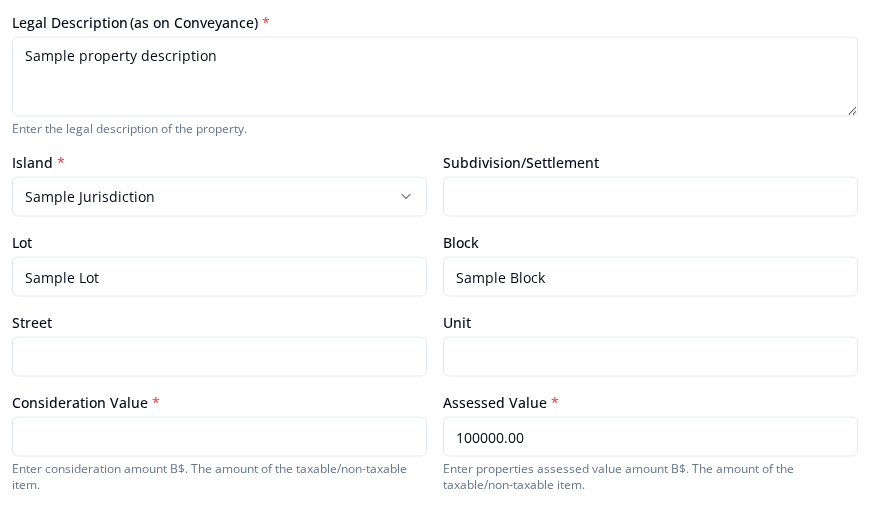
- Complete every other required field. Tyler does not fill the transfer percentage or every value your document type needs. See Complete fields for your document type for general field guidance.
- Select Add Property.
The property appears in Property Information. Review it before you save or make the application ready to submit.
If Tyler does not return the expected property
If the form shows No Tyler data or Tyler lookup failed, check the RPT No. and select Confirm again. If the expected property still does not appear, do not apply or save incorrect details.
What happens next
Complete the other required sections in the application. When you want to keep your work, see Save an application as a draft.